With your Revo Hemera assembled and installed, next you need to configure your RepRap firmware.
We need to make sure the following are set correctly:
- Heater/Thermistor Values
- Maximum Temperature
- Esteps
- Motor current
- Motor Direction
- Modifying offsets
First, you will need a copy of RepRap Firmware. You can simply edit your existing firmware or you can use the online configuration tool to create a new version.
You should only need to use the configuration tool if you do not have a working firmware of your own.
The values in this guide are the same as for V6 Hemera with a standard thermistor and heater cartridge. If you are upgrading from a Hemera fitted with V6, you can move straight on to PID tuning.
Heater and Thermistor Values
To check what version of firmware you are using, go to Settings > General in the left hand menu of the Duet Web Interface.
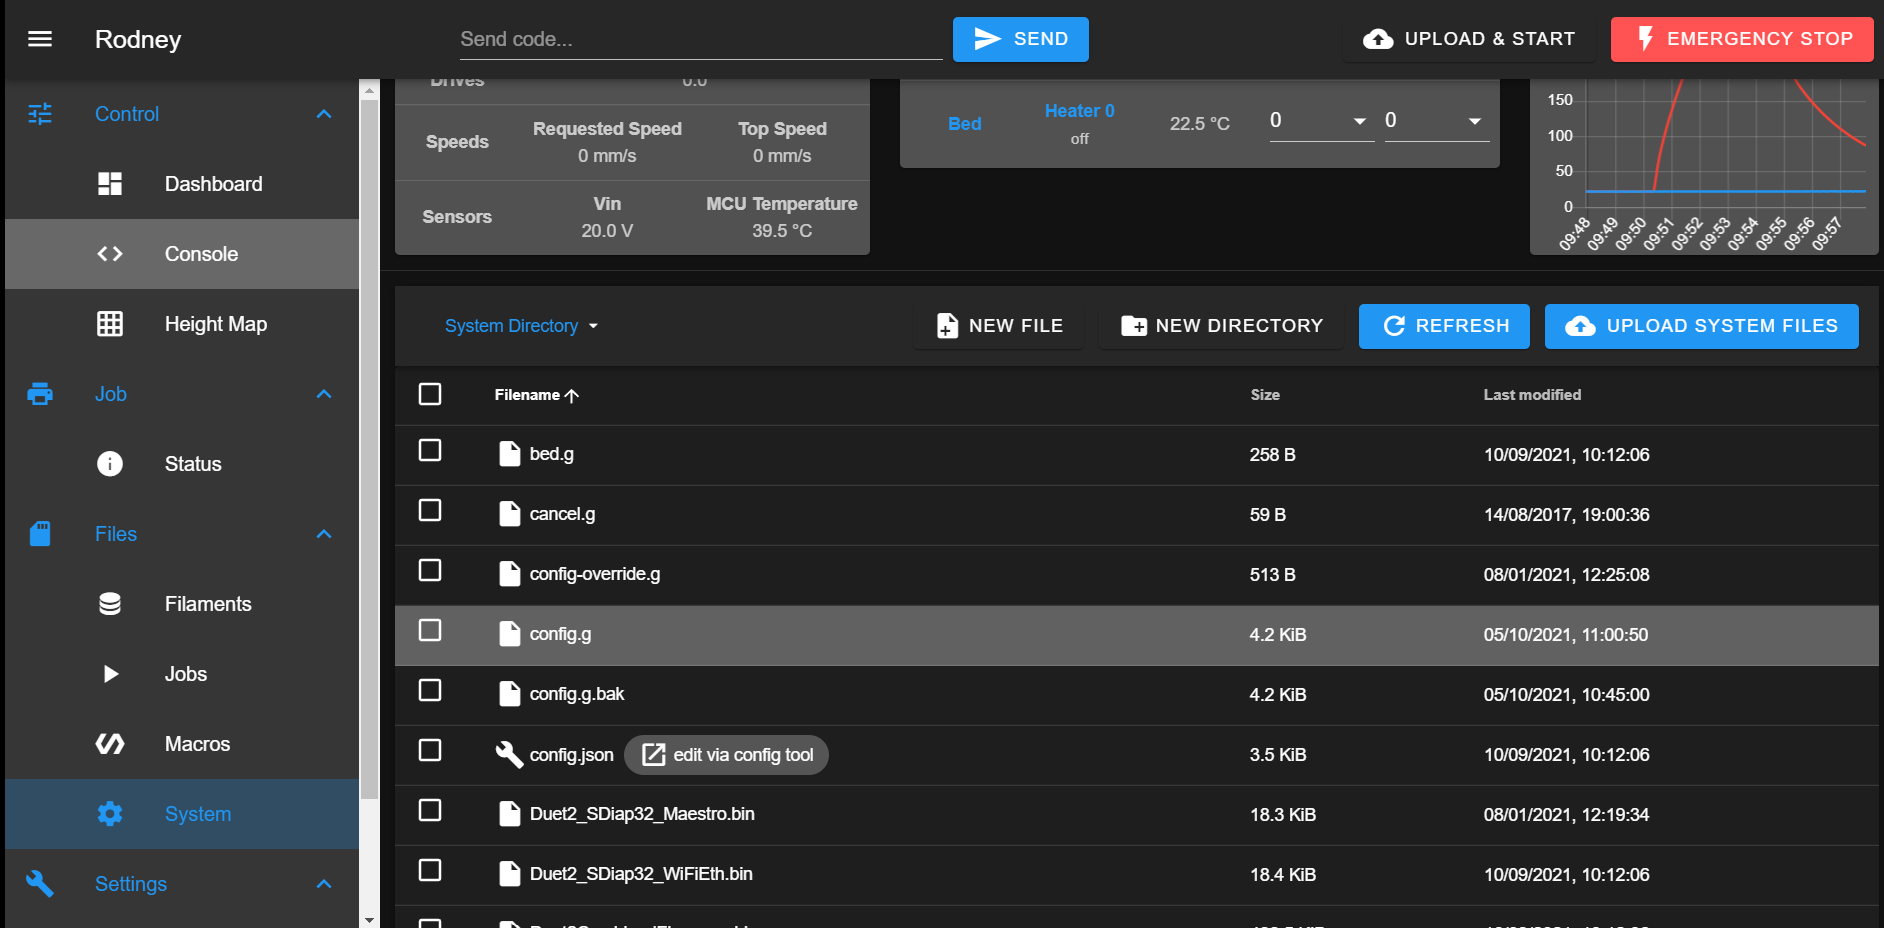
Go to System > config.g :
For firmware versions 1.16 and earlier, replace the existing M305 command in the config.g file with:
M305 P1 B4388
For firmware versions 1.17 and later but lower than 3.0, replace it with the following command instead:
M305 P1 B4725 C7.060000e-8
For firmware versions 3.0 and later, it is slightly more complex:
You need to add the following into your existing M308 command:
T100000 B4725 C7.060000e-8
If using the configuration tool:
Click on the Calculate Thermistor Coefficients button in the Heaters section, and select:
Semitec 104-GT2 (used by E3D)
from the drop-down menu.
Maximum Temperature
In config.g:
Locate the Heaters section and ensure the temperature limit is set to 300 degrees.
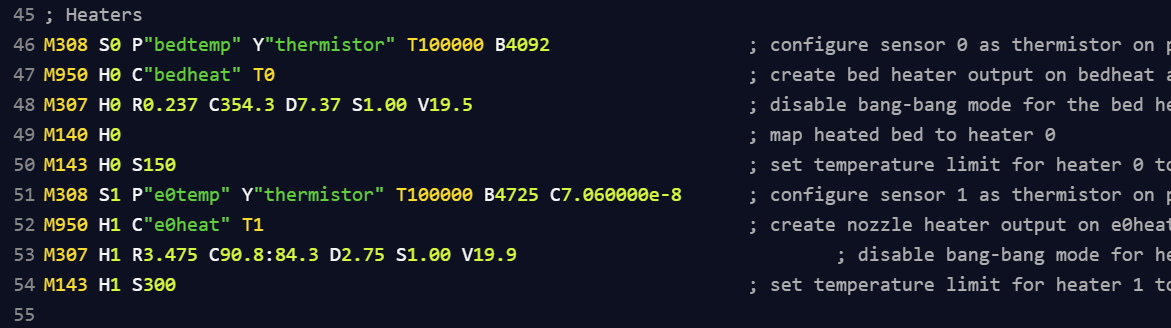
Make sure you change the temperature limit of your HotEnd and not your heated bed.
If using the configuration tool:
Update your maximum temperature by going to the heaters tab and ensuring the option is set to:
300
Remember to restart your printer for your new values to come into effect.
At this point it is a good idea to complete a PID tune so that we can heat up the extruder and check the motor direction is correct.
It is best practise to PID tune your heater after altering heater and thermistor firmware values or it may result in a heater fault.
Click on 'console' in the menu on the left of the duet interface. We will be using the 'Send code...' box to complete the PID tune.
RepRap Firmware 3.2 and Later
From Reprap Firmware 3.2 onwards, a new heater tuning algorithm was introduced. It is more accurate, completes faster and allows you to tune a whole tool rather than just the heater.
To check what version of firmware you are using, go to Settings > General in the left hand menu.
Use the M303 command to run a PID auto tune. Send it using the 'Send code...' bar in console.
M303 T0 S205
M303 - PID auto tune command
T0 - Which Tool? - Remember to cross check this to ensure you are tuning the right tool!
S205 - What Temperature? (205°C)
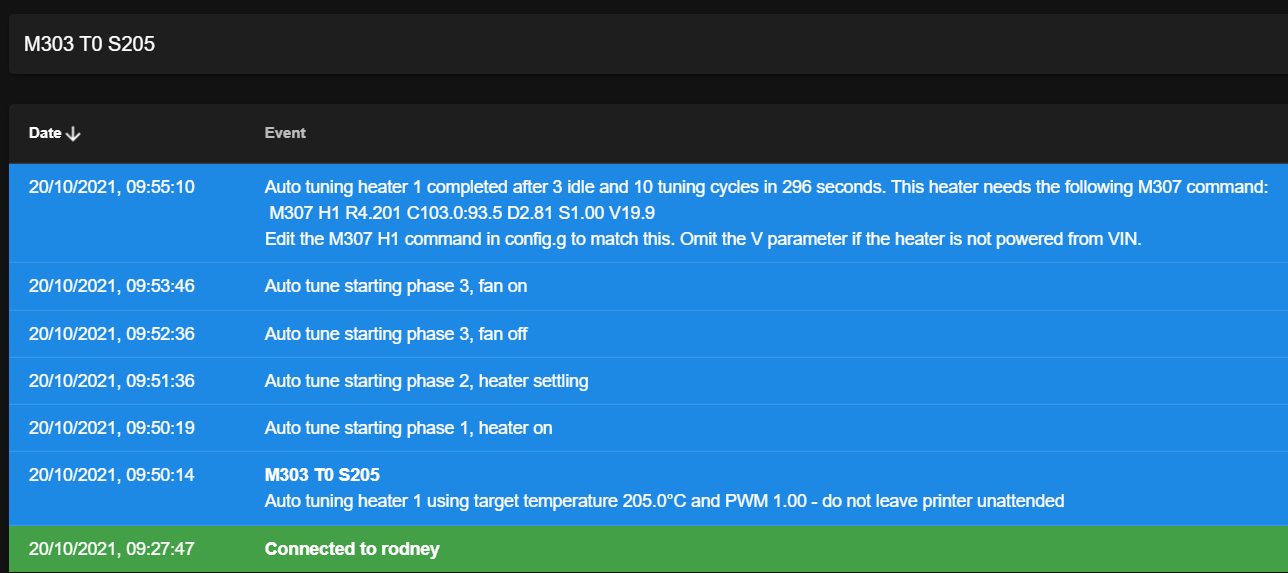
Wait for the auto tuning to finish before doing anything else. Once it is complete, your console should look like this. As it should state in your console, the old M307 command must be replaced by this new one. To do this, you must copy the entire M307 command over to your config.g.
Go to System > config.g.
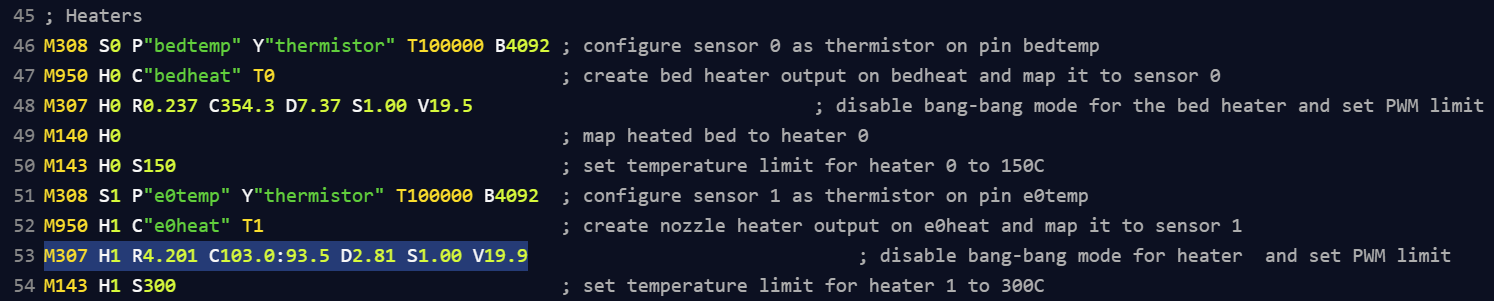
Find the line beginning with M307 and replace it with the copied values from the PID autotune.
Remember to click the save icon and not the X when leaving config.g.
For RepRap Firmware 3.1 and earlier
Use the M303 command to run a PID auto tune. Send it using the 'Send code...' bar in console.
For most accurate results, you should manually set your part cooling fan speed to your most commonly used fan speed. Between 75% and 100% is a good value for PLA.
M303 H1 S205
M303 - PID auto tune command
H1 - Which Heater? - Remember to cross check this to ensure you are tuning the right heater!
S205 - What Temperature? (205°C)
When the PID tune is complete, send an M500 to save the new parameters.
If you run into the following error message when sending M500, "M501 was not executed in config.g" you need to add an M501 to the very end of your config.g.
You can also make a note of the outputted PID parameters and manually change these values in config.g if M500 isn't working for you.
Esteps
Start by re-opening config.g. Look for the M92 command listed under 'Drives'.

You should replace 'E(your old number)' with 'E397'
Remember to click the save icon and not the X when leaving config.g.
Motor Current
Hemera is rated to 1.33A (1330mA) of current. Exceeding this may damage your Extruder.
Open config.g, locate the motor currents line. The E(number) is the value for the extruder. Change this to 1000 to start with.

1000 mA should be sufficient. The lower the current, the more likely the extruder is to begin skipping steps. On the other hand though, the higher the current, the hotter the motor will be to the touch. 1000 is a good balance to start with and can be adjusted further if you wish.
Motor Direction
The final check is to make sure your motor is moving in the correct direction. You can find out if it's working correctly by heating up your HotEnd and trying to extrude some filament.
If it is extruding when you press 'extrude' you are ready to print!
If extrude and retract are the wrong way around, head back into config.g and return to the 'Drives' section.
Look for a series of M569 commands, these control the drive direction of the motors in your printer.

Below the M569 commands, you will find an M584 command. This is how you can identify which M569 command to modify.
In this image, 'E' (Extruder) is mapped to drive 3 and so to reverse its direction, you would need to change the 'M569 P3 S0 command' to M596 P3 S1. (The P3 part refers to the drive number)
Modifying offsets
It is quite possible that in upgrading to Revo Hemera, the position of your nozzle may have changed.
If the nozzle has moved more than a few millimetres, you may not be able to use your full build area even by changing offsets. If this is the case, you should consider using a different mount that gets the nozzle closer to its original position.
If your nozzle has only moved a few millimetres in the X or Y direction, you may be able to regain full use of your build plate by manually changing your axis limits in the firmware.

DO NOT ALTER THE Z AXIS VALUE. You should not alter Z axis limits as this can lead to the nozzle crashing into the bed. It is safe to play with X and Y offsets as the endstops will protect from crashes in one direction and there will be a physical limit in the other direction.
Let's say your new mount has left your nozzle 4mm out in X and -3mm out in Y. To compensate for the start position, you could change the Axis limits to:

Ideally, your new mount would put the nozzle in exactly the same place (in X, Y and Z) as before. This method can be used to account for a few mm but only if there is enough play in each direction on your printer.
If you find that after changing these, the nozzle still won't home in the corner of the bed, it is probably because you have hit an end stop or physical barrier and have no more room to move in that direction. In this case, you can either use the printer with a reduced build area or use a different mount that gets the nozzle closer to its original position.
You have now successfully updated your firmware for Revo Hemera.